Washi Tape Fun


Washi tape can be so versitile.  Here it is starring in the front and center of the card.  Uneven ends give it a casual look.  The gold thread and snowflake give it a more elegant look.  Who knew you could do both casual and elegant in a single card.  The card is super simple and probably takes less than 15 minutes to put together.  It's great if you need to make a lot of these for Christmas.

Be very careful when using the framelits on the champange foil sheets.  I used my cutting pads and they are well used.  They left a light imprint on the foil sheet.  So my tip is when possible use new cutting pads.  Or, place another piece of scrap cardstock over the foil sheet.  That should be enough buffer so the imprint won't happen.  

For the metallic thread, I just wrapped it around three fingers and taped it on the back of the oval with a piece of washi tape.  You can spread it out as you like.  

Until next time...Stampin' Always,

Cheryl, HomeStyle Stamper

Have you tried them?

So, Have you tried the Stampin' Blends?  I have heard they are really nice.  The colors are true to the normal markers.  The caps are snug to say the least.  But that is because they are alcohol based, they will try up faster than normal markers.

Did you see how they are being sold?  In a duo pack, you get the light and dark of the one color, say Calypso Coral.  But, they are also sold individually.  This is great if you just need to replace a single marker.  I'm sold glad that we are given both options on purchasing the markers.  

That's all I have for tonight.  Have a good evening!

Until next time...Stampin' Always,

Cheryl, HomeStyle Stamper

Christmas tree sparkle

 I'm so glad that it's not snowing yet here in Wisconsin.  Give it a couple of weeks and it might.  My girls are having a sister's  weekend at college and we get to see them tomorrow for a little bit.  They both asked for their winter jackets.  Go figure.  

I participated in a demonstrator card swap and Christmas was the theme.  This is what I came up with.   The accent color is Tranquil Tide.  While I was playing with the DSP and Basic Black, I decided it needed a accent color and something going across the middle.  As I looked at my ribbon, all I had that matched the colors was the Tranquil Tide ribbon, so decision was made.  There are times when you have to go with the flow, and this was one.  When I started out, I wouldn't have expected to use the Tranquil Tide in my Christmas card, but it works.  Christmas doesn't always have to be red and green.  

Did you see the foil snowflake peeking out from the top?  I cut one in half and stuck it in the back.  There is a lot of detail packed into the little space, but it's not too much. It goes with the theme of Let it Snow.  

My color combo for this card is super easy.  Just three colors and that's if you even count white!


This was a relatively easy card to make and to reproduce.  When you have to make any quantity of cards, make them relatively to reproduce. I made 19 of these and once I completed the design, it took about 2-3 hours to fully complete them.   Now, yesterday's side-step card I wouldn't recommend making too many of those at one time.  

Click on the top picture for dimensions and instructions.

Until next time...Stampin' Always

Cheryl, HomeStyle Stamper

Tasty Thursday

It's Thursday so that means another recipe.  I saw this one on Pinterest and my fellow Stampin' Up demonstrators were my guinnea pigs.  I wanted to make something for Autumn or Halloween.  Well, Autumn won out.  I didn't have a whole lot of time to be super creative.  It's a Pumpkin Caramel-Cream Cheese Poke Cake.  It's a long name for a wonderful dessert.  My husband even really liked it and said I could make it again.  When he says that, it must be good.  He can be rather particular about food.


Pumpkin Caramel-Cream Cheese Poke Cake

1 Spice cake mix (or you can use yellow cake mix)

1 cup Pumpkin puree, canned

1 cup water

3 eggs

1/2 cup vegetable oil

3/4 cup caramel ice cream topping, divided

8 oz cream cheese, room temperature

2 Tablespoon milk

1 cup powdered sugar

1 1/2 whipped topping (Cool Whip)

Preheat oven to 350 degrees.  Lightly spray 9x13 pan with cooking spray, set aside.

Mix together the cake mix, pumpkin, water, eggs and oil, scraping the sides of the bowl.  Mix until smooth.  Pour batter into prepared pan,bake for 30-33 minutes.  

When the cake comes out of the oven, poke holes in the cake with the end of a wooden spoon.  Do this while the cake is still hot.  In a microwavable safe bowl, heat up a 1/2 cup of the caramel sauce for aobut 20-30 seconds, just to warm it up.  Pour the warm caramel sauce over the top of the hot cake, making sure the majority of the sauce gets into the holes.  Let the cake cool completely.

Once the cake is cool, prepare the cream cheese frosting.  Using an electric beater/mixer, cream together the cream cheese, powdered sugar and milk until smooth and creamy.  Gently fold in the whipped topping.  Spread the frosting over the cake, gently pressing the frosting into the holes of the cake.  Smooth out evenly.

Drizzle the top of the cake with the remaining 1/4 cup of caramel sauce.  For decorate effect, drag a toothpick through the opposite lines of the caramel sauce in the opposite direction to make a herringbone design.  Refrigerate the leftovers.

There you go.  It's an awesome recipe.  Highly suggest if you get a chance, give it a try.

Until next time...Stmapin' Always

Cheryl, HomeStyle Stamper

Out of my Stamping Box

  Now, I normally I consider the putzy cards outside of my stamping box.  And this was definately one of them.  When I saw this stamp set and thinlits in the holiday catalog, I immediately thought of this style of card.  It's a side-step card and really gives you the diorama look. The whole living room scene comes to life.  To me, the ones who receive a card like this should really appreciate the time spent in creating a work of art.  This is the first side-step card I created on my own.  I love it!  

The card base is actually the normal size, 8 1/2 x 5 1/2.  It's all how you cut and score.  I wish I knew how to do a diagram on the computer, but sorry, I don't.  I did post the dimensions on the gallery picture.  But this is how the card base will look when you have cut and scored both sides.  


Now in order to do this card, I would suggest doing things in stages:  1) stamp all the pieces.  2) watercolor  3) cut out with the Big Shot  4) adhere to the card base.  I always suggest doing the watercoloring before you cut the image out.  This is because it's easier to do the coloring on a larger piece and your fingers don't smear the ink until it dries.  

Here is another view of the card.   This view really shows the dimensions of the folds. You can put another piece of paper on the back or the inside so the lucky recipient knows who made this beauty.   


Click on the first picture for the dimensions and directions.  The directions are very detailed.  Contact me if I left anything out.  Good Luck in making this card!

Until next time...Stampin' Always,

Cheryl, HomeStyle Stamper

Time is almost here!

Tomorrow is the day.  It's the day when you can order your own Stampin' Up Blends!  They are alcohol-based markers so that when you use them, the colors blend together.  It makes shading super easy and fun.  They really give dimension to a plain image.  The markers are best when used with the Tuxedo Memento stamp pad.  Reason for this is that the Memento ink keeps a sharp image and won't bleed into the actual Blends color.

Here is a quick video about the Blends. It's only about a minute long so take a look.  If you are new to the Blends, it'll give you an idea of how they work.


Enjoy the video.  The Blends make coloring fun.  And easy.  

Until next time...Stampin' Always

Cheryl, HomeStyle Stamper


They're baaack!!

Have you heard what Stampin' Up is bringing back?  


That's right!  They have improved on the quality of these markers and so they will be back!  The demonstrators have been able to order them this month and gave them a good trial run.  All the feedback that I've seen has been very positive.  They like the quality, not dried out, and true to SU colors.  So, Stampin' Up will be selling them to everyone! And that starts Nov. 1. That's just around the corner.  

I have not had a chance to order the new Blends yet.  But, I really did like the old ones since I didn't have any issues with them.  Of course, these are on my very own wish list.  They are totally fun to color with.  The key is to sit down and just play and experiment with the colors and shading.  

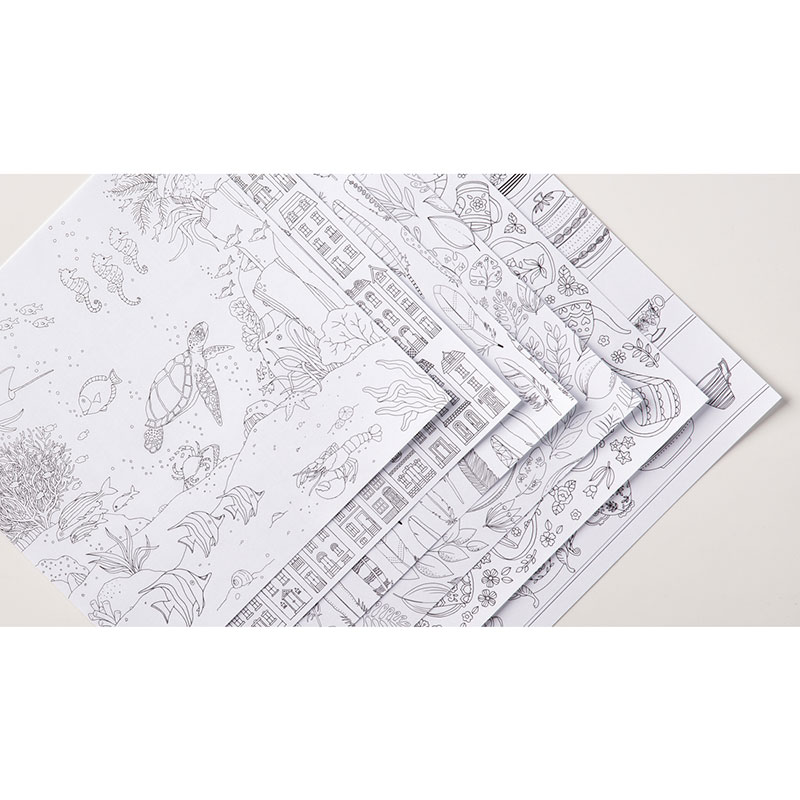
Now don't also forget we have the paper sale still going on until Oct. 31.  That's buy 3 get one free.  Can you imagine how beautiful this Just Add Color DSP would look if you used the Stampin' Blends?  You would be creating a totally one-of-a-kind paper for sure.  

Until next time...Stampin' Always

Cheryl, HomeStyle Stamper


Tasty Thursday -No Bake Peanut Butter Granola Bars

Tasty Thursday means it's time for another recipe.  This is one that my family loves, especially my daughter Megan.  It's homemade granola bars.  For a while she had me making them pretty much weekly.  What I like about them is that I can eat one for breakfast, and not be hungry again until lunch.  They are soft and chewy, great to break apart and nibble on.  Sometimes I add chocolate chips or mini m&m's.  Even mini marshmallows would be good.  One thing I have learned is not to skip putting in the refrigerator.  For some reason, they don't turn out as well, but you don't have to keep them in the fridge.  I store mine in a container on the counter.

No Bake Peanut Butter Granola Bars

4 cups quick oats

2 cups Rice Krispies

1 cup flax seed

1 1/2 cups creamy peanut butter

1 cup honey

1/2 cup brown sugar

1 teaspoon Vanilla

Line 9 x 13 pan with foil.

In large bowl, combine oats, Rice Krispies, and flax seed.  In microwavable bow combine peanut butter, honey, vanilla and brown sugar.  heat in 30 second increments until melted and smooth.  Combine well with dry ingredients.

Press into pan.  Refrigerate for 1 hour.  Remove and cut into bars.  

Enjoy them.  My family sure does!

Until next time...Stampin' Always

Cheryl, HomeStyle Stamper